Your vacuum pump suddenly isn’t pulling like it used to, and your project is at a standstill. It’s frustrating when equipment you rely on fails. Let’s get it working again.
A vacuum diaphragm pump typically loses suction due to external air leaks, internal component failure like a worn diaphragm or faulty valves, or blockages in the air pathway. Systematically checking your tubing, fittings, and filters first will often solve the problem without needing to open the pump.
As an engineer with over 22 years of experience in the micro pump industry, I’ve seen this issue countless times. It can feel like a complex problem, but the root cause is often surprisingly simple. Let’s walk through the troubleshooting process step-by-step, starting with the easiest and most common culprits.
How Can External Leaks Cause a Major Loss of Suction?
You can hear the pump running hard, but the vacuum gauge won’t budge. It feels like you’re trying to empty a pool with a leaky hose. The problem might not be the pump at all.
Even a tiny, invisible pinhole leak in a tube or fitting can destroy your vacuum. Instead of removing air from your system, the pump just pulls in an endless supply of outside air. The first step in any diagnosis is to meticulously inspect every external connection.
I always tell people to think of a vacuum system as a sealed chain. The pump is just one link. Any weakness in the other links—the tubing, the connectors, the seals on your chamber—will break the entire chain. A powerful pump cannot compensate for a bad seal.
A Systematic Leak-Finding Method
Don’t just glance over your setup. You need to be methodical. Start at the pump’s inlet port and work your way to the end of your application, checking every single connection point.
- Visual Inspection: Look for obvious cracks in plastic tubing, especially at bend points. Check if any push-to-connect fittings look crooked or if hose clamps feel loose.
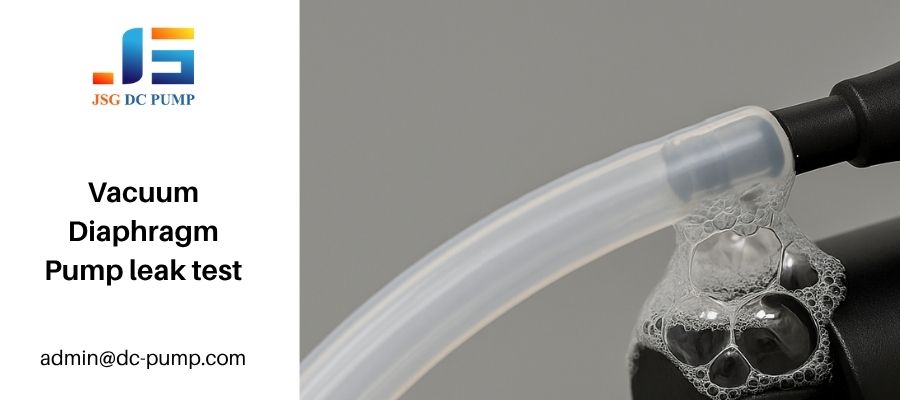
- The Soapy Water Test: This is a classic for a reason. Mix a little dish soap with water. Apply it to all suspected leak points while the pump is running. If there’s a leak, the pump will suck the soapy water in, creating visible bubbles or foam.
- Isolation: If you have a vacuum gauge, use it to test sections of your system. Connect the gauge directly to the pump’s inlet port. If it pulls a strong vacuum, you know the pump is fine and the leak is somewhere downstream.
Common Leak Points and Their Solutions
| Leak Location | Common Cause | How to Fix |
|---|---|---|
| Tube Connections | Loose fitting or cracked tube | Re-seat the tube, tighten the clamp, or trim the end of the tube and re-insert. |
| Filter Housings | Improperly sealed threads or O-ring | Unscrew the housing, check the O-ring for damage, and re-tighten securely. |
| Device antechamber | Worn gasket or seal | Inspect the gasket for cracks or compression; replace if it looks damaged. |
Could a Simple Clog Be Suffocating Your Vacuum Diaphragm Pump’s Performance?
Your pump motor sounds perfectly healthy, but almost no air is moving through the system. You’ve checked for leaks and found nothing. The pump may be trying to breathe through a blocked straw.
A blockage in the air pathway will prevent the pump from creating a vacuum, even if it’s in perfect working order. Debris, dust, or moisture can easily clog inlet filters, tubing, or the pump’s own valve system, effectively suffocating its performance.

I once helped a client who was ready to replace a dozen expensive pumps in their lab. I asked them to check the small, disposable inline filters they were using. It turned out the filters were completely saturated with moisture and debris. Replacing those tiny, inexpensive parts brought all their pumps back to full power.
Diagnosing a Blockage
The troubleshooting process for a clog is one of elimination. It’s about systematically isolating parts of the system to find the choke point.
- Check the Inlet Filter: This is the most common place for a clog. If you have an external filter, remove it and see if suction improves. If so, clean or replace the filter.
- Inspect the Tubing: Disconnect the tubing from the pump and your device. Look through it to see if there is any visible debris or condensed liquid inside. A blast of compressed air can often clear it out.
- Test Pump Airflow Directly: With all tubing disconnected, turn the pump on and place your finger over the inlet port. You should feel strong suction immediately. If you do, the pump is not the problem, and the clog is somewhere in your external setup. If the suction feels weak even here, the clog might be internal.
Internal vs. External Clogs
| Clog Type | Symptoms | Troubleshooting Steps |
|---|---|---|
| External | Strong suction at pump inlet, but weak suction at end of the line. | Check filters, tubes, and connectors for debris. |
| Internal | Weak suction directly at the pump’s inlet port. Motor may sound strained. | Requires opening the pump head to inspect the valve plate and diaphragm chamber. |
Always start with the assumption that the clog is external, as this is far more common and easier to fix. Only move on to inspecting the pump’s internals after you have completely ruled out external issues.
Are Worn-Out Internal Parts Like Diaphragms or Valves the Culprit?
You’ve ruled out leaks and clogs, but the pump is still weak. The motor runs, but it just doesn’t have the power it once did. The problem is likely inside the pump head itself.
Like any mechanical device, the internal components of a diaphragm pump wear out over time. The flexible rubber diaphragm can tear, or the small flapper valves can become brittle or blocked, preventing a proper seal. This internal failure is a common cause of gradual suction loss.
In my 22 years at JSG DC PUMP, I’ve seen countless pumps brought back to life with a simple service kit. The diaphragm and valves are the heart of the pump. They are constantly moving and flexing. Eventually, they will wear out. The good news is that on many models, they are designed to be replaceable.
How to Inspect the Pump Internals
Warning: Always disconnect the pump from power before performing any service.
- Open the Pump Head: This usually involves removing a few screws from the top of the pump. Carefully lift the top plate off.
- Inspect the Diaphragm: The diaphragm is the rubber or elastomer sheet connected to the motor. Look closely for any tears, holes, or signs of stretching, especially around the edges where it’s clamped. A damaged diaphragm cannot create a proper vacuum seal.
- Check the Valves: The valves are typically small, thin pieces of rubber or metal that act as one-way gates. They sit in a valve plate. Check to see if they are lying flat and are free of debris. If a valve is stuck open, the pump cannot hold a vacuum.
When to Repair vs. When to Replace
| Symptom | Likely Cause | Solution |
|---|---|---|
| Gradual loss of suction over time | Diaphragm fatigue or valve wear | Install a repair kit (new diaphragm and valves). |
| Sudden, total loss of suction | Catastrophic diaphragm tear | Install a repair kit. |
| Motor runs but makes a clicking/knocking noise | Debris in valve or damaged piston | Open and clean the pump head; if damaged, replace the pump. |
If the pump is a critical part of a larger device and has been running for thousands of hours, sometimes a full replacement is a more reliable long-term solution than a repair.
Is Your Motor’s Power Supply Secretly Sabotaging Your Vacuum?
Your pump is mechanically sound, but it runs slowly or inconsistently. The suction fluctuates, and the motor sounds weak. You might be looking for a mechanical problem when the real issue is electrical.
A vacuum pump’s performance is directly tied to its motor’s speed and torque. If the motor receives insufficient voltage or current, it can’t run at full power, leading to poor suction. An undersized power supply or a failing battery can make a healthy pump appear faulty.
This is an issue I see often with OEM clients integrating our pumps into new devices. They design a beautiful product but forget that the pump needs a stable supply of power, especially during startup. A power supply that can’t handle the initial current spike will cause the motor to stall or run erratically.
Diagnosing Power Issues
Before you blame the pump, you must verify its power source.
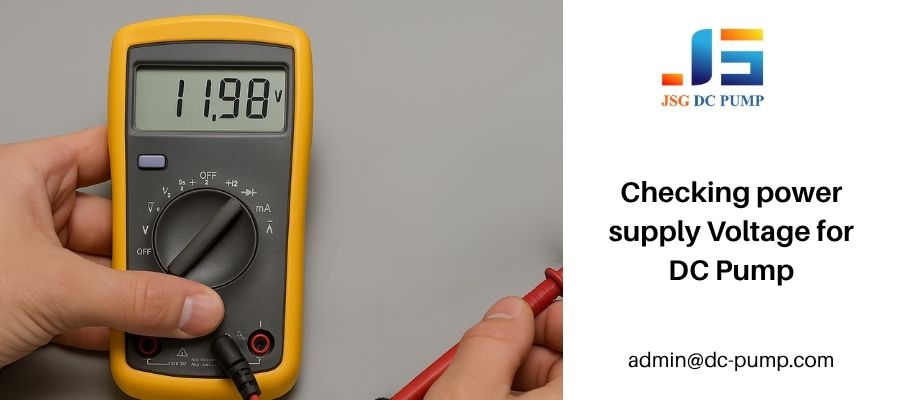
- Check the Voltage: Use a multimeter to measure the voltage directly at the pump’s terminals while it is running. A 12V pump should be receiving close to 12V. If you see a significant voltage drop (e.g., it drops to 9V), your power supply is too weak or failing.
- Assess the Current Rating: Your power supply’s amperage (A) rating must be high enough to meet the pump’s needs. A good rule of thumb is to use a power supply that can provide at least 1.5 times the pump’s rated current to handle startup surges.
- Look at the Wiring: Thin, long wires can cause voltage drop over a distance. Ensure the wires connecting your pump are of an adequate gauge for the current they are carrying.
Power Supply Checklist
Use this simple table to ensure your power setup is correct.
| Parameter | What to Check | Why It Matters |
|---|---|---|
| Voltage (V) | Must match the pump’s nominal rating (e.g., 12V for a 12V pump). | Incorrect voltage can damage the motor or cause it to run poorly. |
| Current (A) | Power supply’s max amperage should exceed the pump’s peak draw. | An undersized supply will cause voltage to drop under load, starving the motor of power. |
| Polarity (+/-) | DC motors must be connected with the correct polarity. | Reversing polarity can cause the motor to run backward or not at all. |
Fixing the power supply is often much cheaper and easier than replacing the entire pump.
How Can Overheating Cause Your Micro Pump to Lose Its Grip?
Your pump starts strong, but after a few minutes of running, the suction slowly fades away. The pump body is hot to the touch. This isn’t a coincidence; heat is a direct enemy of performance.
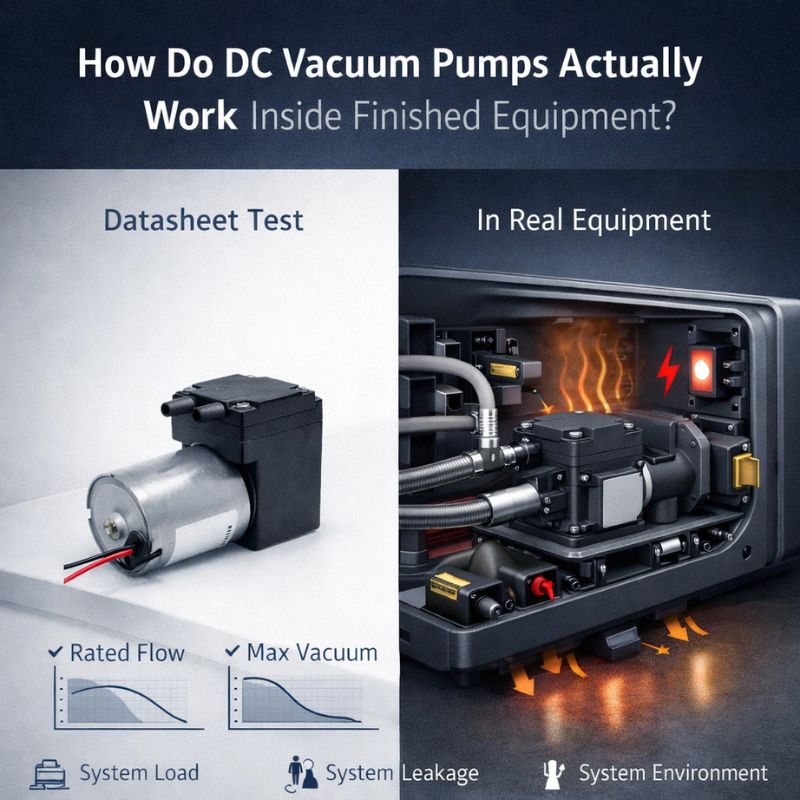
Overheating can cause a diaphragm pump to lose suction in several ways. The motor’s efficiency drops, internal components can expand and lose their seal, and the diaphragm itself can become too soft to function properly. Proper ventilation is critical for maintaining consistent performance.
In my work designing fluid solutions, thermal management is a huge part of the process. A pump is essentially a machine that converts electrical energy into mechanical work, and some of that energy is always lost as heat. If that heat cannot escape, performance will suffer.
The Science Behind Heat-Related Failure
Heat impacts your pump in three main areas:
- Motor Performance: As a DC motor gets hotter, the resistance in its windings increases. This means it draws more current to do the same amount of work, becoming less efficient and losing torque. This directly translates to weaker suction.
- Thermal Expansion: The different materials in the pump head (plastic, metal, rubber) expand at different rates when heated. This can cause the precise seals around the diaphragm and valves to loosen, creating small internal leaks.
- Diaphragm Elasticity: The elastomer diaphragm is designed to work within a specific temperature range. If it gets too hot, it can become overly soft and pliable, failing to create the sharp “snap” needed to move air effectively.
How to Prevent Overheating
| Prevention Method | Why It Works | |
|---|---|---|
| Ensure Proper Ventilation | Allows ambient air to flow over the pump body, carrying heat away. | Avoid placing pumps in small, sealed enclosures without airflow. |
| Manage Duty Cycle | Run the pump intermittently (e.g., 50% on, 50% off) if possible. | Gives the pump time to cool down between cycles, preventing heat buildup. |
| Reduce Ambient Temperature | The cooler the surrounding air, the more effectively it can cool the pump. | Don’t operate pumps next to other heat-generating equipment. |
If your application requires continuous operation in a hot environment, you may need a pump specifically designed for high-temperature use or consider adding a small cooling fan.
What If Your Diaphragm Vacuum Pump Is Working Perfectly But Is Still the Wrong Choice?
You have tried everything. There are no leaks, no clogs, no power issues, and the pump is brand new. Yet, it still can’t achieve the vacuum you need. The painful truth might be that you have the wrong pump.
Sometimes, suction loss isn’t a failure but a limitation. The pump may not be rated for the required vacuum level, or its materials may not be compatible with the gases being pumped. Using the wrong pump for the job will always lead to performance that feels like a failure.
I often consult with engineers during their initial design phase. A common mistake is choosing a pump based on only one specification, like max flow, while ignoring max vacuum or chemical compatibility. It’s crucial to look at the entire picture of your application and match it to the pump’s full datasheet.
Matching Vacuum Pump to Application
Before you blame the hardware, review your requirements against the pump’s specifications.
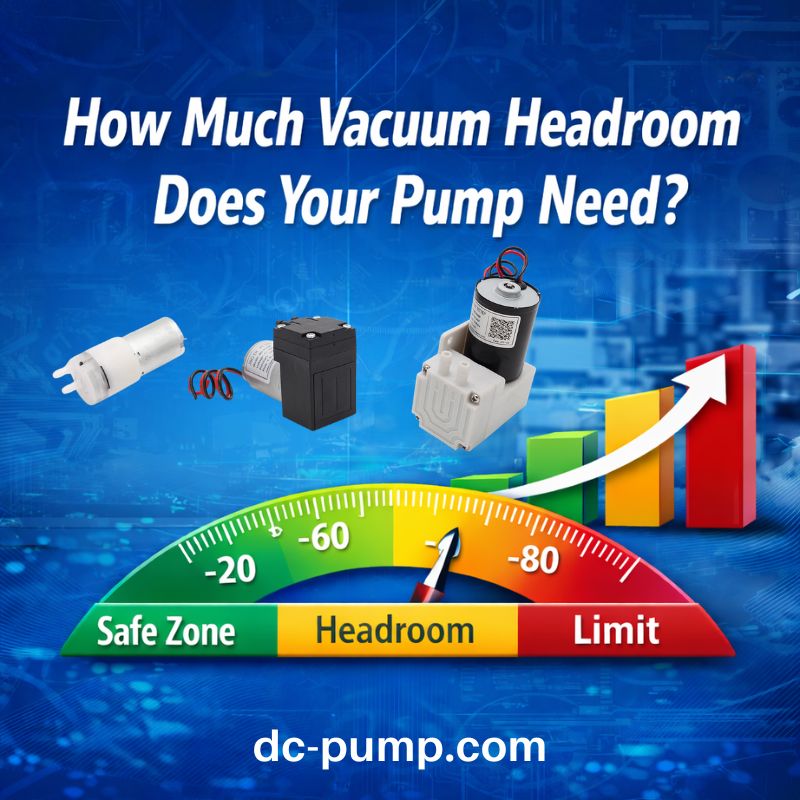
- Vacuum Level: Does your application require a deep vacuum of -90 kPa, but your pump is only rated for -70 kPa? No amount of troubleshooting will close that gap. You need a higher-performance model.
- Flow Rate at Vacuum: A pump’s flow rate drops as the vacuum level increases. Check the pump’s performance curve. You might need a pump with a higher open flow rate to achieve the desired flow at your target vacuum.
- Chemical Compatibility: Are you pumping anything other than air? Certain gases, solvents, or moisture can attack the diaphragm and valve materials (like EPDM), causing them to swell or degrade, leading to a loss of seal. You may need a pump with a more resistant material like FKM (Viton).
When to Seek Expert Advice
| Your Situation | Why Expert Help Is Valuable |
|---|---|
| You are designing a new device. | A pump manufacturer can help you select the most efficient and cost-effective model from the start. |
| You are pumping unusual gases or vapors. | We can advise on material compatibility to ensure a long service life for your pump. |
| Your performance needs are on the edge of a pump’s specs. | We may be able to offer customized solutions or suggest a more suitable model. |
Don’t be afraid to reach out to the manufacturer. A short conversation with an application engineer can save you weeks of frustrating troubleshooting.
Conclusion
Diagnosing suction loss in a diaphragm pump is a process of elimination. By methodically checking for external leaks, clogs, and power issues first, you can solve most problems quickly and efficiently.
If you’re still unsure or need customized technical guidance, our engineering team at JSG DC PUMP is ready to help you troubleshoot and optimize your system for maximum performance.
📧 Contact us: admin@dc-pump.com
🌐 JSG DC PUMP – Precision Solutions for Every Micro Pump Application